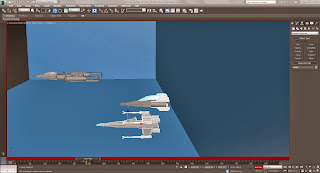
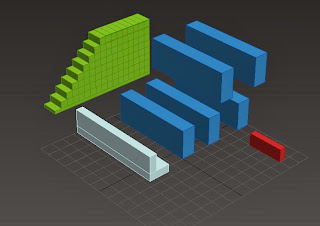
Handed in the animation yesterday, here's a few screenshots from the workspace;
This is how it looks on the outside. I used a Geosphere and applied a space texture to it for a background
This image shows where I placed four of my cameras - the fifth one is just above the screencap. I found the 'create camera from view' option to be very useful when placing cameras. It also shows the massive blue cube that I used as a stand-in for a kind of capital ship where the smaller ships take of from - in future, if I dont have a model of the capital ship I need to find a way to make something like this less obvious.
This is an attempt at a first-person view of the X-Wing. As I hadn't modeled the inside of the cockpit, I had to do with placing the camera just before , and make it look down on the nose a little.
My attempts at 3d modelling
Friday, 20 December 2013
Wednesday, 18 December 2013
Almost there....
Right now I've done the animation and placement of the cameras. Unfortunately I had to cut some stuff from my original idea due to time constraints, so the animation ends with the ships entering hyperspace.
So. here's the final shot of the animation! Now I just need to render it and edit the clips together.
So. here's the final shot of the animation! Now I just need to render it and edit the clips together.
Tuesday, 10 December 2013
Animation progress - 30 seconds!
After setting the correct time for the animation in 3ds Max, which is:
Animation length: 30 seconds
Framerate: 30 fps
I found out that 30 seconds... isn't as much time as I originally thought. The first 'scene', where the ships take off, ended up taking about 12 seconds, which nearly half the time I have. This is obviously too long, so I've sped things up so it only lasts about 4 seconds. This makes it look too quick for me, but I think anyone else would find the scene too slow and boring.
The planned sequence of events in the animation is;
- Ships take off
- Camera cuts to outside main Rebel ship as the squad zooms towards the camera
- X-wing breaks down, causing the other two to slow down/stop.
- One or both of the ships that are still working return to the base.
How this actually works out could easily change as I continue working on the animation though.
Thursday, 7 November 2013
Star wars models so far (and a mood board)
First, my mood board, with some images of the three ships I plan on doing - an A-Wing, X-Wing and Y-Wing. These are the models so far, I will work on them more so they are better for the animation itself as they are all still lacking detail.
The main problem with the A-Wing is that it's too blocky. I tried to counter this with the smooth modifier, which ended up making it look worse, although it did help to make the cockpit window look better.
The X-Wing's nose is still too pointed and the window is still too fat. I also need to give it an R2 unit.
For the Y Wing screenshot, I have also shown how I used the schematics I got of Wookiepedia to help act as guides - I had to make seperate images for each viewpoint, and apply each to one of the planes I had aligned around where I did my model. I also gave each plane a layer, so I could temporarily get rid of one if it was in the way.
Monday, 28 October 2013
A few weeks late...
... but here's my first post! Only just got round to doing this so I'll be covering what would have been the first few updates in the next few posts.
Castle:
This was made just using the Standard primitives (Box, Cylinder etc. and the Connect and Extrude tools to made the raised bit at the top. I was trying to go for something simple, and I think this worked out OK, although I'm sure I could've done something else with the door at the bottom.
Ruined Building:
I'm not happy with this.I tried to make an abandoned supermarket with holes in the wall/ceiling etc. I think I need to experiment with different shapes with boolean operations, since just using spheres here was clearly not good enough.
The second image shows what's in the interior, which I also struggled with because I tried to create, shape and move the models inside it. I now know that it would be more efficient if I created the models outside the building and then moving them into the building.
One more small point - the walls where originally yellow, which made dealing with edges a bit difficult as they would blend in to the model. Also it made the building look like a mutated slab of cheese, which didn't help things.
Plane:
This is actually my second attempt - I abandoned the first attempt because it was all uneven due to me not being able to find the symmetry modifier. This attempt looks much better, although it is still quite simple.
Once I had the cylinder shaped using the FFD 3x3x3 modifier, I did the rest of it by extruding polygons and resizing them to shape the wings, tail etc. Applying the plan images to planes helped a lot because it helped me keep the proportions in check, and the layer tool allowed me to turn off the side, front or bottom image if it was in the way - the first image shows the model with the guide, and the second shows it without the guide.
Subscribe to:
Comments (Atom)


